The project tool and associated dashboards allow users to track planned consumption, cost and carbon savings of projects against real location-level data over time.
How to Add Projects
Projects can be added at anytime by navigating to the Task module from the left-hand navigation menu.
If this is your first trip to the Tasks & Project module, there may be a few of our helpful onboarding tasks waiting for you. Don't worry though, you can complete these in your own time, or delete if you want to **see below for how to delete projects, and this support page for how to delete tasks
Once in the Tasks module, you will see a �Tasks� and �Projects� tab. Enter into the �Projects tab and look out for the Create Project button in the top right corner. It looks like this:

Project fields in the modal
Complete the modal with the information required.
Please note all projects need to be attributed to a 'Scheme'. Schemes can be created by your Business Admin or Account Manager. Additional information can be found in this article: How can I create a Scheme for my Projects
- Project Name - This will appear in the project menu and dashboard, and so should be a clear, concise project name.
- Description - This text box is for a longer form explanation of the project.
- Scope of Area Project is Impacting - This field allows you to specify whether the project impacts a specific part of your organisation e.g. does it impact a location, area, department, or the entire organisation
- Priority � Select the project priority.
- Location(s) � Select the location(s) where the projects are happening.
If you cannot see the location in this dropdown, type the name of the location in the search function. If the location doesn�t appear, navigate over to the configuration menu and you can add them there.
- Category - With this drop down, you can select the type of project e.g. is it an energy generation project, or a water reduction project. The category you select will determine the unit of measurement the reduction/generation is recorded in (kWh, m3, t, km etc.). These are pre-defined, if you require another category type please reach out to your Account Manager.
- Scheme � With this drop down, you can select the type of scheme the project falls within. Multiple projects can be part of the same scheme (i.e. An LED lighting project might be at a specific location, but it is part of a wider LED scheme which is operating at multiple locations). New schemes can be created in configuration by your Business Admin or Account Manager.
It can be helpful to think of the relationship between categories, schemes and projects in the following way:
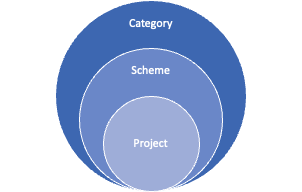
- Categories group schemes into utility types (kWh, t, m3, km). These are pre-determined in Rio, but if you see a case for a new category, please contact your Account Manager.
- Schemes are then used to group a number of the same types of projects together.
- Projects are used to capture the specifics of what you want to monitor and measure in the dashboards, including the cost, utility and associated carbon metrics of the planned project.
Examples of Categories and their relationship to Schemes:
- Owners - Each project has a creator, and associated Owners. Here you can assign ownership of the project to any other member of your Rio account. If you want to assign it to yourself, feel free, just select your name from the drop down.
As with Locations, if you cannot see the user in this dropdown, navigate over to the configuration menu, and you can add them there.
- Project Cost � Here you can input the total project cost
- Implementation Date (Start Date) - The date you would expect to start making savings from your project.
- Date for planned benefits to be achieved (End Date) - The date which you anticipate your planned savings to be realised.
- Baseline Year Start Date - The annual period to compare project performance against.
- Planned Action � Input the total planned change in consumption/generation e.g. for an energy generation project, it�s expected to generate 100,000 kWh by the end of the project, or for an LED lighting scheme it might reduce consumption at a location by 10,000kWh over the project period.
- Planned Benefit (Carbon) - Input the total planned change reduction. This figure should be positive. Negative values will be automatically converted to a positive value in the Project Dashboard.
- Planned Benefit (Cost Saved) - Input the total planned cost saving. This figure should be positive. Negative values will be automatically converted to a positive value in the Project Dashboard.
- Milestone Frequency � Here you can select the milestone frequency from quarterly, 6 monthly, or yearly. If the planned benefit is to reduce electricity consumption by 50kWh over 5 years and the milestone is set to yearly, then the milestones will be 10kWh per year. Y1 = 10, Y2 = 20, Y3 = 30, Y4 = 40 etc.
- Evidence Name � This field allows you to explain any evidence or documentation that is attached to the project, such as a project brief, by clicking on �Attach evidence�.

How to Edit Projects
To find all projects, you can navigate to the Task module from the left-hand navigation menu, and enter the �Projects� tab.
The Project menu is searchable and filterable in a few different ways.
Depending on you access rights, you may also be able to toggle between My Projects and High Priority Projects.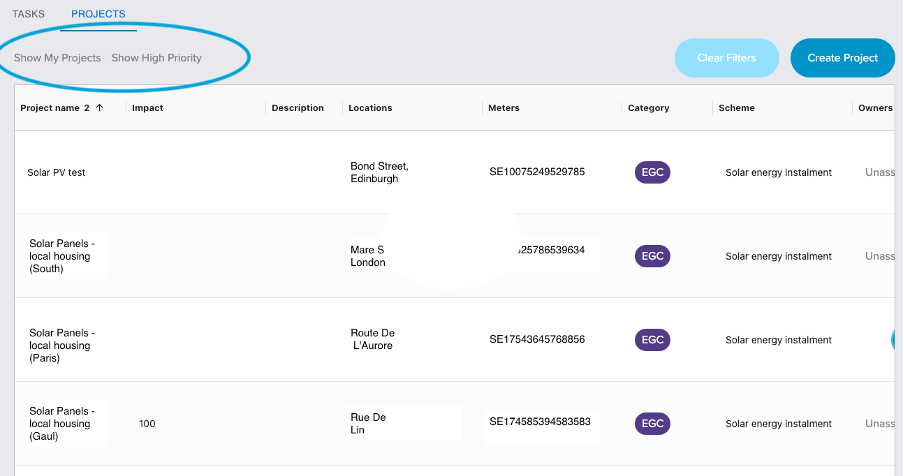
You are able to further search and filter using the burger menu found to the right of the column headings.
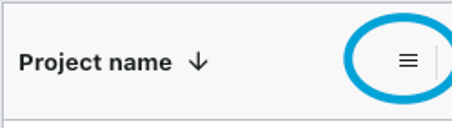
Each column has the ability to text search, or manually remove common entries. You can also remove unnecessary columns. These filters will be saved for the next time you return to this Project menu.
Once you have honed in on the projects you need to edit. You can click anywhere on the project to open up the dedicated project page, or you can scroll to the right and click on the pencil to open up the project modal.
If there is a lot of information on the project, we would suggest using the Project Page - click anywhere on the project - as you will be able to view all the information on one page. The modal is best utilised for smaller changes, and tweaks, such as amending a date.
How to Delete Projects
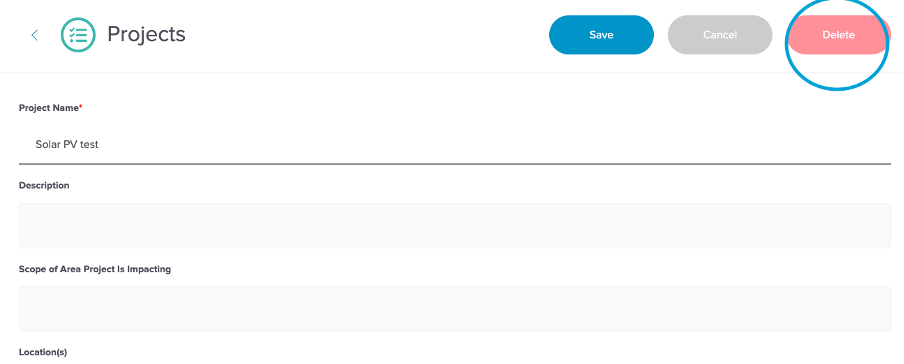
You cannot undo deletion of Project manually. If you have deleted a project, and cannot recreate it please contact support@rio.ai.
To delete the project, open up the Project Modal, scroll to the bottom, and hit the delete button in the top right left corner.